Big and Little Orange Bags

So, we headed to Colorado this week, and as a present for the relative in whose basement we like to crash while there we picked some oranges and grapefruit from the trees in our backyard. I didn’t feel like handing them over in a plastic shopping bag, though (not classy!) so during the drive I whipped up some white cotton mesh bags.
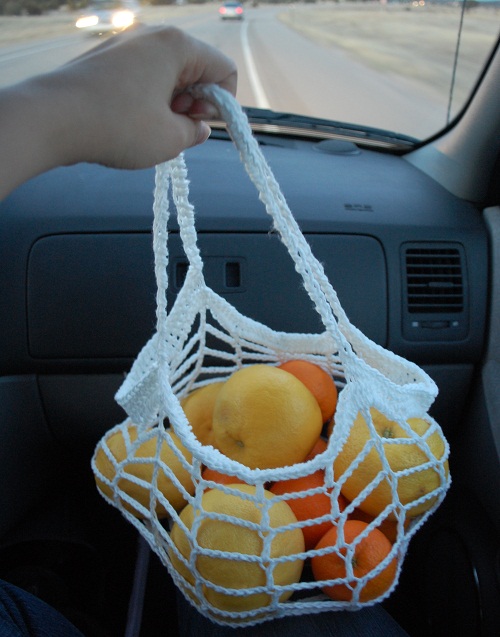
This bag held six oranges and six large grapefruit. Would you like to make one?

Big Orange Bag

Materials:

  • Peaches & Creme or similar 100% cotton yarn
  • H/8 (5.00 mm) hook
  • Yarn needle

Directions:

Rnd 1: Ch 4. *[Dc, ch 1] in 4th ch from hook. Repeat from * 5 more times; sl st in 3rd stitch of starting ch to join.

Rnd 2: Ch 5. *Skip ch from previous rnd, dc in next dc. Ch 2. Rep from * around; sl st in 3rd ch of ch 5 to join.

Rnd 3: Ch 7. *Skip chains from previous rnd, dc in next dc. Ch 4. Rep from * around; sl st in 3rd ch of ch 7 to join.

Rnd 4: Ch 10. *Skip chains from previous rnd, dc in next dc. Ch 7. Rep from * around; sl st in 3rd ch of ch 10 to join.

Rnd 5: Ch 14. *Skip chains from previous rnd, dc in next dc. Ch 11. Rep from * around; sl st in 3rd ch of ch 14 to join.

Rnd 6: Ch 10, dc around center of ch-11 from Rnd 5; ch 7. *Dc in next dc, ch 7. Dc around the center of the ch-11 from Rnd 5; ch 7. Rep from * around, sl st in 3rd ch of ch 10 to join.

Rnds 7-13 (or desired length): Ch 10. *Skip chains from previous rnd, dc in next dc. Ch 7. Rep from * around; sl st in 3rd ch of ch 10 to join.

Rnd 14: Ch 3; dc in each ch and dc around. Sl st in 3rd ch to join.

Rnd 15: Ch 1, sc in the same st. Ch 45; skip 31 dc, sc in next dc. Sc in each of the next 32 dc. Ch 45, skip 31 dc. Sc in next st and each of the next 31 dc. Join rnd.

Rnd 16: Ch 1; sc in each sc and ch around, join rnd. Finish off, weave all ends securely.

I also made a smaller one. I put a dozen oranges in it, but that was stretching its capacity. It would have been much happier with something like eight.
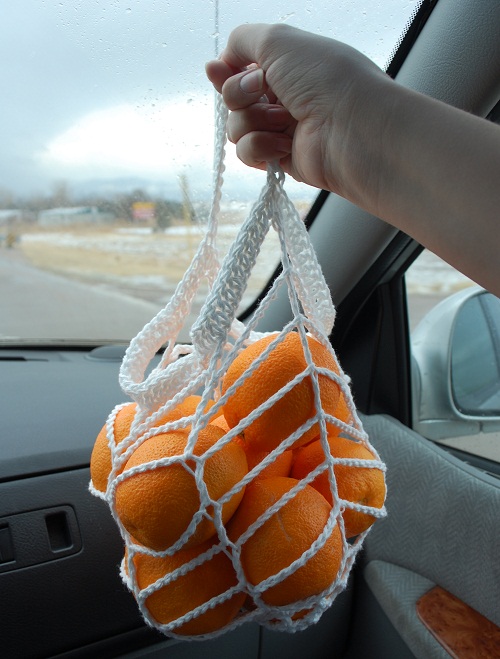
I’ve got directions for this one, too!

Little Orange Bag

Directions:

Rnds 1-4: Work as for big orange bag.

Rnd 5-11 (or desired length): Ch 14. *Skip chains from previous rnd, dc in next dc. Ch 11. Rep from * around; sl st in 3rd ch of ch 14 to join.

Rnd 12: Ch 3; dc in each ch and dc around. Sl st in 3rd ch to join.

Handle: Ch 20. Sl st in point of Rnd 12 directly opposite. Sl st in next st (of Rnd 12), sc in each st of the ch-20. Sl st into next st of Rnd 12 to join. Finish off; weave in ends.

I hope you like them!

Easy Strawberry Jam 2 Ways

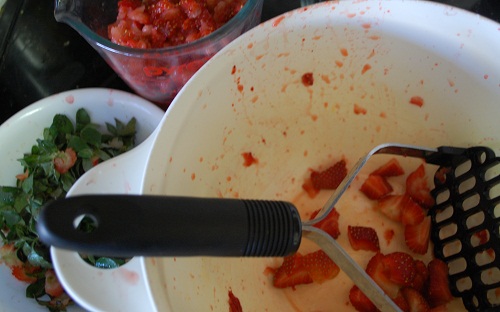
We’ve been having parfaits for dessert a lot recently (in which I convince the kids that fresh fruit and yogurt are dessert by putting a dollop of whipped cream on top), so when they had a killer deal on strawberries on Fry’s, I bought a lot of them. Unfortunately for the strawberries, though, we’re taking a surprise trip to Colorado this week. Rather than let the half-gallon of strawberries that remained molder in the fridge while we were away, I decided to make some jam. Since I had two quarts of strawberries, I wanted to compare two recipes for making jam ‘the easy way.’

Strawberries!

First up: Freezer Jam! I’ve made this before, but not recently. I remember that it turned out pretty well if a little soft. There are worse things in the world than gooey jam.

Strawberry Freezer Jam
Ingredients:

  • 1 quart ripe strawberries
  • 4 cups sugar
  • 1 box of pectin (I used Sure Jell)
  • 3/4 cup water

Wash, hull, and mash your strawberries. I used a potato masher but I ended up cutting them into pieces first. Either the strawberries were unusually firm or my potato masher is weak. Maybe I need one that doesn’t have a plastic head. Anyway, after you’ve mashed them you should have 2 cups. Mix the mashed strawberries into a bowl with the sugar and let it sit for about 10 minutes.

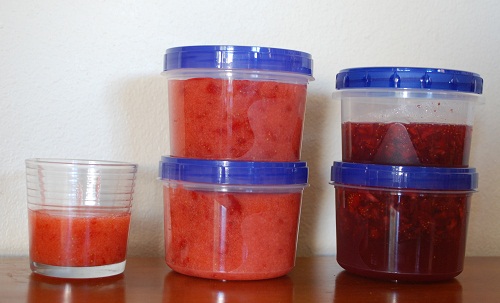
While your strawberries are sitting, you can wash and dry your containers. I like to use the small Ziploc twist-on containers. They hold about 2 cups, so I end up using two and also a small glass for overflow and immediate consumption.

Then, mix the water and pectin in a small saucepan. Turn the stove on high and bring it to a boil, stirring constantly. Boil and stir constantly for one minute, then pour the pectin in with the strawberries and stir for about three minutes until it’s not grainy any more.

Fill your containers, then cover them. (Make sure to leave half an inch at the top for freezing.) You’re supposed to let it sit out for 24 hours before your refrigerate or freeze it, and it’s supposed to last for up to a year in the freezer, or about 3 weeks in the fridge…but let’s be serious here. It’s not gonna make it that long.

The second method is in a bread maker! (Can you believe it? Crazy. It makes sense, though, because it can do the heating and constant stirring for you.) I had a recipe for jam that came with my bread maker and I tried it out almost immediately. It was a terrible bomb, although we did enjoy the lovely strawberry syrup that resulted. It was all the more frustrating because I had gone out and bought the liquid pectin it called for, which is expensive! We joked that I’d do it again the next time we made waffles – minus the pricey pectin, that is. So, when I came across a recipe for jam in the bread maker that called for nothing but strawberries and sugar, I was intrigued.

Strawberry Jam in the Bread Maker

Ingredients:

  • 1 quart ripe strawberries
  • 3 1/4 cup sugar

Wash, hull, and chop/mash your strawberries as for the other recipe. You should have about 2 cups of mashed berries. Put the berries and sugar in the bread maker, turn on, and set to the ‘jam’ cycle. When it’s finished, take it out and let it cool in the pan before transferring to storage containers. (It’s hot!) Storage is the same as for the freezer jam.

Now, for the results:

Ta-da! Jam!

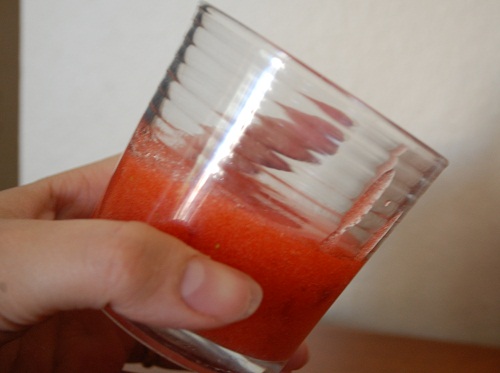
Jam! As you can see, there’s quite a difference between the two. The freezer jam is on the left and made about four and a half cups, the bread maker jam is on the right and made about three cups. I’m guessing that the difference in yield is due to the extra sugar, water, and pectin in the freezer jam. Probably the strawberries cooked down a little bit in the bread maker jam, too. Now, it has definitely not been the recommended 24 hours, but already the freezer jam has set up a bit:

Whereas the bread maker jam definitely has not.

but, it’s early yet. I’ll have to make a note if it sets up in the fridge, as I would definitely rather use this recipe if it works. Less sugar, no pectin? Right on.

Either way, they’re tasty!

Surprise! New Printer-Friendly Coding

I recently got a message from a reader that basically said, “Hey Melissa! I really like your patterns, but when I try to print them off of your blog, it won’t work! Can you help?”

So, I went to the post with the Basic Baby Beanie pattern and pulled up a print preview. It was a mess! (How have I never noticed this before?!) So I spent a few hours coding and I’m pleased to announce that my blog is now printer friendly! When you print, it should automatically omit stuff like sidebars and post thumbnails and so on. It’s not perfect (if you’re printing off a single post you’ll get a stack of images from the suggested posts, for instance) but it’s a vast improvement over the previous method. Go ahead, click print preview! Nice, right?

I hope this helps!