Smooth, Sweet Chocolate – from Scratch!

You may remember my post from last year, when I discovered how easy it was to make chocolate candy at home. I included two of my initial recipes, which are delicious but not perfect. Don’t worry – over the last year I’ve spent more than a little time (ha!) tinkering, experimenting, and honing this process. This week there was a breakthrough! Take a gander at this:

Oh yeah, baby. Beautiful!

Yeah, I made that. What mystic sorcery did I employ, you may ask? What arcane formula and esoteric ingredients did I combine to create this beautiful, beautiful confection? Did I temper it, or boil it, or just forge it with lightning?

Forget that. I made this in about 30 seconds.

Smooth, Sweet Chocolate
Ingredients

  • 1 tbsp coconut oil (melted)
  • 1 tbsp cocoa powder
  • 1 tbsp powdered sugar

Directions

  1. If your coconut oil has solidified, run the closed container under hot, hot water until enough is melted for your purposes.
  2. Measure ingredients into a small bowl and mix together. I like to use a small rubber spatula because it’s easier to extract every scrap from the bowl!
  3. Transfer liquid chocolate to the mold of your choice and place in the freezer (if you want it ASAP) or the fridge (for people with patience) until solidified.

And that’s it. I used a small silicone mold that I bought in Japan; a silicone ice cube tray would probably work well, although depending on size it might not all fit in one pocket. My little chocolate above is probably two and a half or three inches across. If you don’t have any silicone molds, try foil. (Paper muffin cups are not a great choice: the oil likes to soak in and when it solidifies it sticks.)

This chocolate will definitely melt in your hand unless the weather is really cold (remember, coconut oil has a melting point of 75 degrees Fahrenheit) but it’s soooo smooth and delicious you won’t mind licking your fingers.
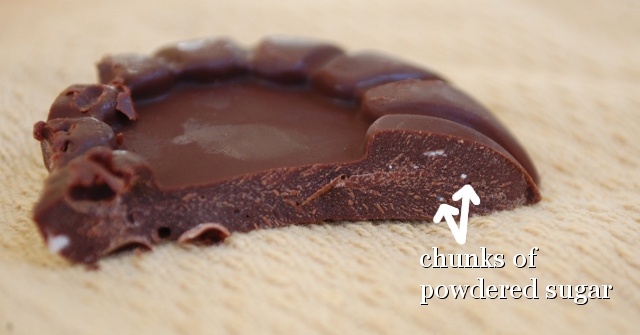
Beautiful. Except for powdered sugar lumps.

See how smooth and perfect it is inside? (Um, except for the powdered sugar that I didn’t quite get mixed in, in my haste. Don’t hate!) I’m already plotting some sort of filling for this so I can make a tiny candy bar. This recipe as written is 160 calories, but you can make it larger or smaller as you like, just keep equal proportions of sugar, cocoa, and oil.

Enjoy!

Banana-Button Buttermilk Pancakes

When the bananas head south, it’s time to make banana bread. But what if you’re tired of banana bread? What if you’re bored by banana bread? What do you make then?

Generally, I would say banana pancakes, but it just so happened that I had brown bananas and buttermilk in the fridge at the same time…which sparked some creativity.

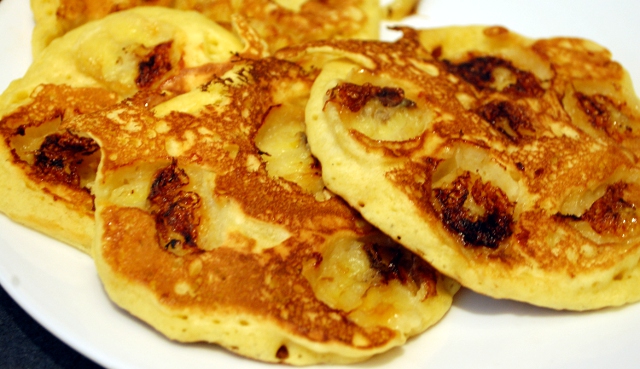
Mmm, pancakes!

What you see here is a buttermilk pancake with slices of caramelized banana baked into it. Oh yeah. Want to give it a try?

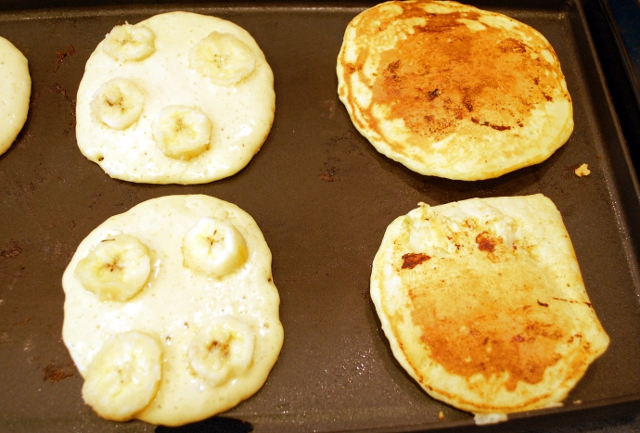
I'm not the only one who see buttons here, right?

Banana-Button Buttermilk Pancakes

Ingredients:
2 eggs
2 c all-purpose flour
2 tbsp sugar
2 tsp baking powder
1 tsp baking soda
1 tsp salt
2 c buttermilk
4 tbsp butter, melted
1/2 tsp vanilla extract
2-3 ripe bananas
Oil or cooking spray

Directions:

  1. In medium or large bowl, beat eggs until frothy.
  2. Add buttermilk, melted butter and vanilla. Mix well.
  3. Add flour, sugar, baking powder, baking soda and salt. Stir until just blended (it’s okay to have some lumps.)
  4. Grease griddle and heat to medium high.
  5. While griddle is heating, slice bananas. Thin slices are better, but don’t go crazy.
  6. Pour about 1/3 c of batter for each pancake; quickly place sliced bananas into batter. I found that four in a sort of button arrangement worked well, but I may just have a thing for oversized buttons.
  7. Cook until bubbles form on the tops and the batter is set; flip and cook other side until golden. (The side with bananas in it will take significantly longer to cook.)
  8. THEY WILL STICK TO YOUR SPATULA so be prepared to scrape off caramelized banana and reapply grease often.
  9. Repeat until you’re out of batter or bananas or both. (If you run out of bananas, these are tasty without them as well.)

Serve warm with syrup.

BONUS RECIPE!

I love homemade fresh fruit syrup on my pancakes, but the last thing I need to be doing while flipping flapjacks is running over to the stove to stir a pot of syrup. One day it occurred to me that I could make syrup in my bread maker and it would regulate the cooking and stirring for me. (You can even put it in a bit ahead of time and set the timer so the syrup is hot and ready at the time you want to have dinner!)

Berry Syrup – in the Bread Machine

Ingredients:
1 lb (approx 3 cups) of fresh or frozen (thawed) berries
1 c sugar

Directions:

  1. Wash (if fresh) and finely chop or smash berries.
  2. Pour berries into bread pan; add sugar.
  3. Set bread maker to “Jam” cycle and walk away!

This recipe makes about 2 cups of syrup. If your bread maker has a 2 lb capacity you can double it! Mmmm. We had strawberry syrup on our banana pancakes, and it was delicious!

This entry was posted in Recipes.

A Brief Moment of Quietude

So, in the helter-skelter of getting the Summer Issue ready, I ended up doing a LOT of crocheting at the last minute. As I was doing that, something interesting happened – I started to have fun. It was like something lost coming back to me. I can’t tell you how long it’s been since I’ve crocheted just for the fun of it, instead of because I was anxious, or I had a deadline, or someone was having a birthday, or a baby, or to solve a problem. It feels like it’s been a really long time. After I got Crochetvolution published, I blinked, looked around, and said to myself, “You know what? That was fun. I want to do that some more.”

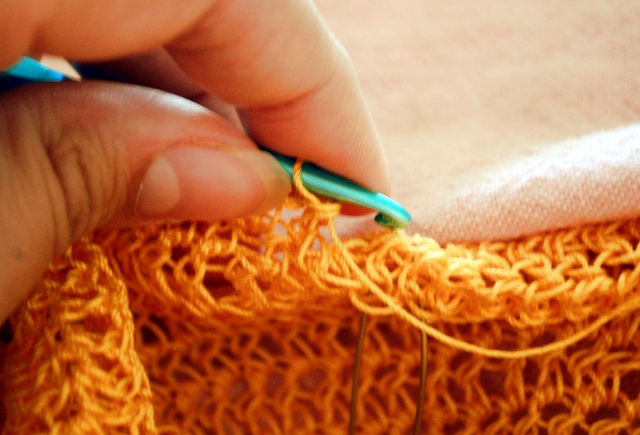
This is fun. And happy. And yellow!

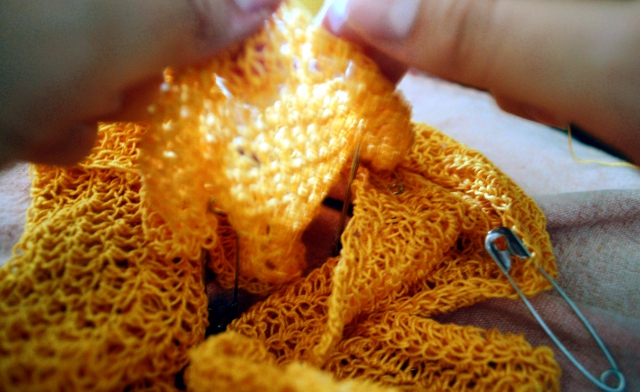
I’m doing a large thread project – which sounds totally restful, I know, haha – but the stitching is simple and the fabric is lovely and I’m finding it deeply satisfying. It should take me a while to finish, too, but that’s just part of the fun. I’m ready for a little peace and predictability.

It's a little bit of sunshine.

So while I was serenely crocheting away, I remembered something I did last year about this time…

May is for Moms!

and I thought, you know what? I think I’ll do that again. Not because I have to, but because I think it will be fun. Hooray for fun! And calm. And routines. And peaceful predictability. If you’ve forgotten (or haven’t seen it before) be sure to click on the “May is for Moms” logo to check out the wrap up from last year.

Meanwhile, I have some boring routines to establish. 😀