Kitchen Couture

So, when I crocheted all the way through the first ball of thread in that yellow project I was working on, I decided to take a break. Which, in my mind, apparently means going out and buying a cone of kitchen cotton. Because you know what? Nothing says “quick, easy project” like a full-sized apron. Right?
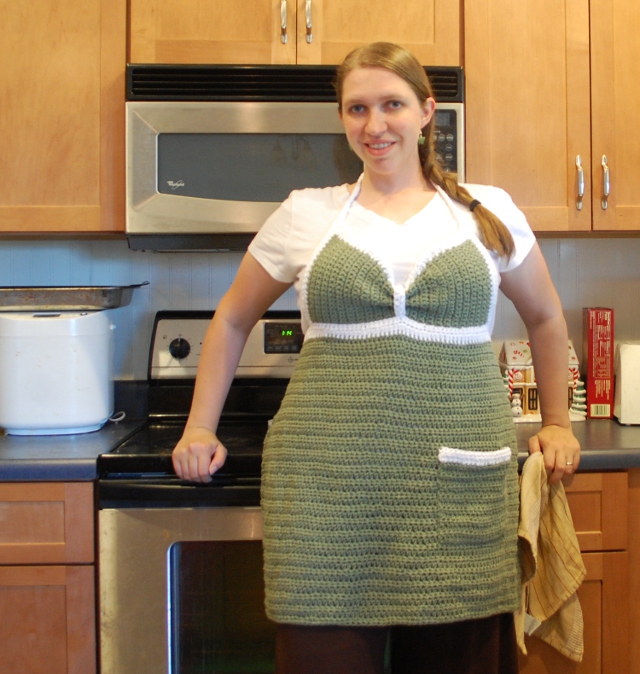
Seriously. It was fun!

I’ve got a serious lack of fun aprons around here. For as much time as I spend in the kitchen, you’d think I’d have a few. After a few weeks of wearing the same pink apron every day, I decided that it would be reasonable, practical, and not really that difficult to crochet one.
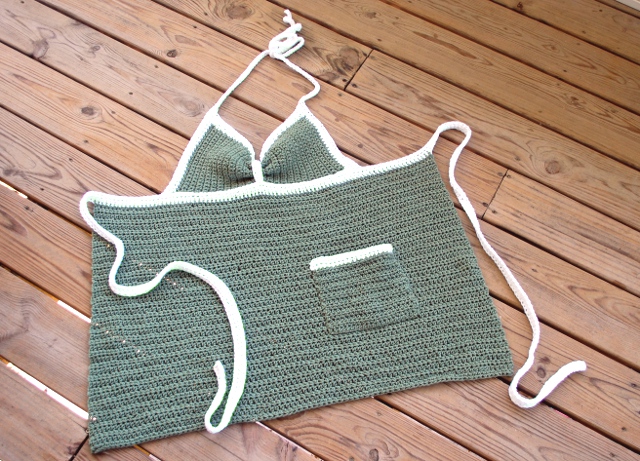
Lookin' good!

It’s not this color in person…it’s a much nicer, much prettier avocado green. Neither my camera skills nor my GIMP skills were able to correct it. Oh, well. I still think it’s crazy cute for an apron. Don’t you?

Kitchen Couture Apron

Size: One size fits most. I based the measurements off of an apron I had purchased.

Materials

  • Peaches & Creme [100% Cotton, 690yds/630m per 14oz/396g cone] 1 cone Avocado (MC)
  • Peaches & Creme [100% Cotton, 122 yds/112m per 2.5oz/70g skein] 1 skein White (CC)
  • H/8 (5.00mm) hook
  • Yarn needle

Note: I didn’t use the whole cone, and by my calculations you may be able to get away with using 5 skeins instead. I like the cone because I don’t have to weave in so many ends, though!

Directions:

Bodice

Row 1: With MC, ch 21. Sk 1 st, sc across. (20 sc) Turn.

Rows 2-17: Ch 1. Sc in each st across. Turn.

Row 18: Ch 1. [Sc in next st, sc dec across next 2 sts] 3 times. Sc across to end. (17 sc) Turn.

Row 19: Ch 1. Sc in each of the first 8 sts. [Sc dec across the next 2 sts, sc in next st] 3 times. (14 sc) Turn.

Row 20-29: Ch 1. Sc in each st across. (14 sc) Turn.

Row 30: Ch 1. [Sc in next st, sc inc in next st] 3 times. Sc across. (17 sc) Turn.

Row 31: Ch 1. Sc in each of the first 11 sts. [Sc in next st, sc inc in next st] 3 times. (20 sc) Turn.

Rows 32-47: Ch 1. Sc across (20 sc) Turn.

Row 48: Ch 1. Sc across. Finish off.

Bodice Edging

Row 1: Working on top/curved edge of bodice, join CC at corner. Ch 2. Placing 1 st in each row across, hdc 17, sc 14, hdc 17. Turn.

Row 2: Ch 2. Hdc in the first 17 sts, sc in the next 14, hdc in the last 17 sts. Finish off.

Top Ties

Row 1: With CC, join at bottom edge of bodice (to work up side). Ch 2. Hdc in each stitch up to Bodice Edging (20 hdc); place 2 hdc in each row of hdc (4 more). Ch 77, turn.

Row 2: Sk 2 ch. Hdc in each ch (75) and hdc (24) across. (99 hdc) Finish off: repeat for other side of bodice.

Side Ties

Row 1: With CC, LOOSELY ch 121. Place 2 sl st in each row of Top Tie (4 sl st). Place 1 sl st in each row of Bodice (on the FLAT side – 48 sl st). Place 2 sl st in each row of Top Tie on other side. Ch 123. (300 sts)

Row 2: Sk 2 ch. Hdc in each ch and sl st across. (298 hdc) Turn.

Row 3: Ch 2, hdc across. Finish off.

Skirt

Row 1: With MC, skip 105 sts of Side Ties and join yarn. Ch 2; hdc in same st and each of the next 87. (88 hdc) Leave remaining stitches unworked: turn.

Rows 2-43: Ch 2; hdc across. Turn.

Row 44: Ch 2; hdc across. Finish off.

Bodice Detail

Row 1: With CC, ch 12. Sk 2 ch; hdc in remaining ch across. (10 hdc) Turn.

Row 2: Ch 2; hdc across. (10 hdc) Finish off.

Pocket

Row 1: With MC, ch 22. Sk 2 ch; hdc across. (20 hdc)

Rows 2-14: Turn; ch 2. Hdc across. (20 hdc)

Row 15: Switch to CC, finish off MC. Turn. Ch 2; hdc across.

Row 16: Turn. Ch 2, hdc across. Finish off.

Finishing

  1. Use Bodice Detail to gather Bodice in the center. Sew one end of Bodice detail to front (where Bodice meets the Side Ties), bring it over the top, and sew the other end to the place where the Bodice meets the Side Ties on the inside.
  2. Sew pocket to desired place, leaving white side (at top) unsecured so you can get your hand in there. 😉
  3. Weave in all ends. Enjoy!

Copycat Reese’s Shell

It was late. The kids were in bed. Greg turned to me and asked in a plaintive voice, “Honey, what do we have for a treat?”

“We have some ice cream in the freezer,” I replied.

“Do we have anything to go on it?” he asked hopefully.

“Weeeell… I bet I could use the coconut oil to make some Magic Shell,” I said.

And I did!

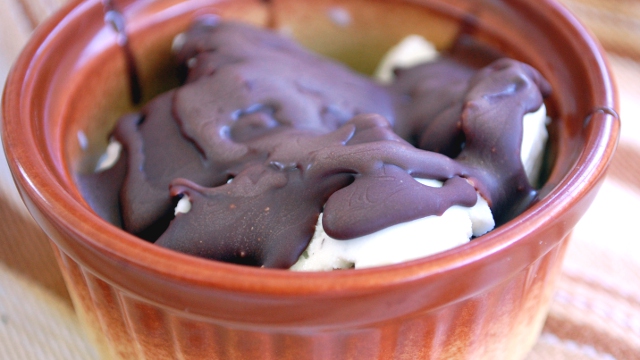
See? It hardens up perfectly.

Reese’s Shell is our absolute favorite ice cream topping, with its chocolaty, peanut-buttery, smooth, crispy goodness. However, it’s pretty darn expensive for the amount that comes in a bottle, and we tend to run out of it long before we finish off the ice cream that we bought at the same time. Fortunately, with the magic of coconut oil (don’t forget, it has a freezing point of 75 degrees Fahrenheit) I can make a fantastic approximation using inexpensive pantry items that I always have in my cupboards. You don’t have to have chocolate or candy chips to melt down, and best of all – unlike versions that use butter – all of the ingredients are shelf-stable, so it should stay good for much longer than it will take you to devour all of it.

Oh yeah. This is so right.

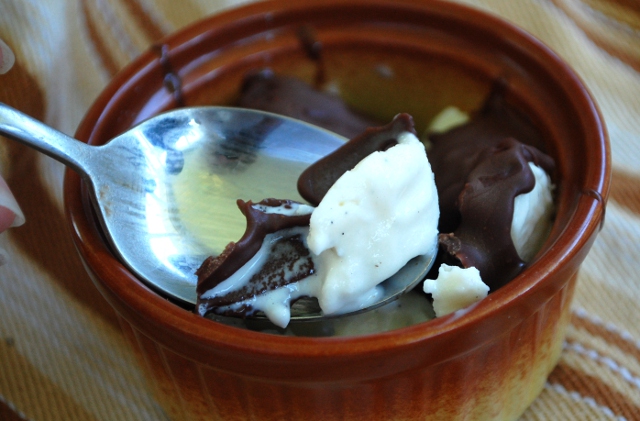
It was too dark to take pictures last night, which means that I had to fix up this ice cream just to take a picture of it…which, you know, breaks my heart.

Oh yeah, baby.

Copycat Reese’s Shell
Ingredients:

  • 1/2 c coconut oil (measured when solid)
  • 1/2 c powdered sugar
  • 1/4 c cocoa powder
  • 1/4 c creamy peanut butter

Directions:

  1. In a small saucepan, combine all ingredients.
  2. Heat on medium-low until melted.
  3. Remove from heat; allow to cool. Pour into a container (I used a pint-sized mason jar) and seal until needed.
  4. If your “Shell” solidifies, it can be microwaved until melted. Be sure not to make it too hot, though, or you’ll melt your ice cream before it can freeze your “Shell!”
  5. Enjoy.

Makes somewhere around 1 cup of topping (shown here, minus three servings of ice cream slathered with this stuff).

Mmm, chocolaty peanutbuttery goodness!

I can’t help thinking that this would be so much fun in other flavors, but I’m a bit stumped for ideas. I’ve really only seen the chocolate and peanut butter flavors of Magic Shell! Any ideas? What flavor would you like to make?

This entry was posted in Recipes.

And Now, a Word About Birthstones

Birthstones are, simply put, stones or gems meant to represent the month you were born. As far as I can tell, these days they are only used by teenaged girls and for mother’s jewelry – but hey! It’s kind of fun, right? As a teenager I didn’t do much with my birthstone (which was apparently something called “blue zircon,” so plebian, bleh) but as a mother I am all for cheesy combinations of obscure stones in a piece of jewelry to represent my children.

When I decided I wanted to make some mother’s necklaces, I surfed on over to Fire Mountain Gems (which is where I order all of my jewelry supplies) to pick up some birthstones. It was far from the simple matter I had thought, though. Their chart of suggested birthstones has four different columns. Some stones remain pretty consistent across the board, like garnet for January, and others vary wildly. October, for instance, could be represented by aquamarine, tourmaline, rose sapphire, or opal! Looking it up on Wikipedia confused the issue even further, adding even more versions of the birthstone list to the mix.

In the end, I went with a combination of the Traditional and Modern birthstones listed on Fire Mountain Gems, with some substitutions for super-expensive stones (like diamonds).

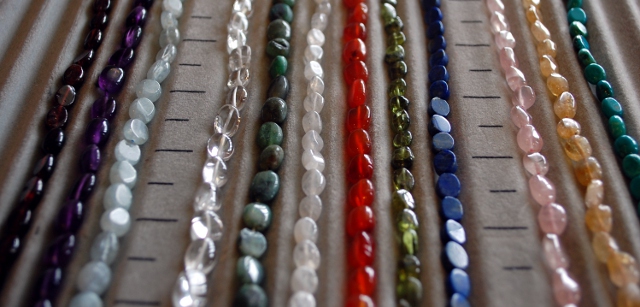
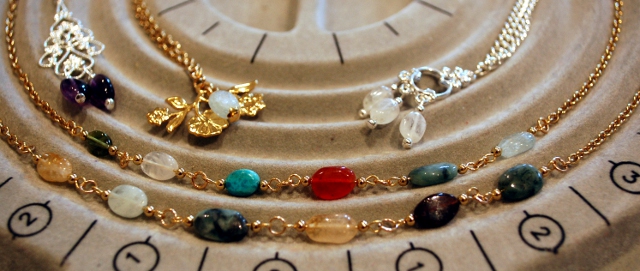
Aren't they pretty?

From left to right, those are garnet (January), amethyst (February), aquamarine (March), quartz (standing in for diamonds for April), emeralds (May – I was surprised that real emeralds were cheap enough for me to buy a string of them), moonstone (June), carnelian (instead of ruby, that stuff is expensive – July), peridot (August), lapis lazuli (it’s as blue as sapphire, even if it’s opaque – September), rose quartz (instead of tourmaline, which is apparently also expensive – October), citrine (November) and turquoise (December). I like turquoise much better than blue zircon.

Once I had the stones, putting them together in necklaces was pretty simple.

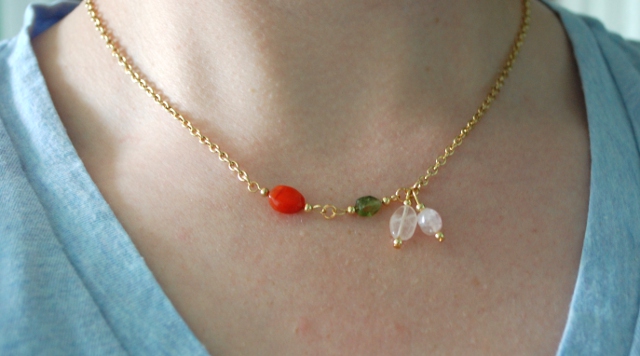
This is my necklace.

July, August, and two in October. I wanted to do something different for the twins…Greg thinks it looks strange and lopsided. I like it, and it’s my necklace, so there. Haha.

The nice thing about necklaces made of links is that it’s extremely simple to add more children later, if it proves to be necessary (unlike pieces where each stone is in a setting). I made one for my sister, and my mother, and my grandmother, and then I made a necklace featuring their own birthstones for each of my two sisters who don’t have children.

It's all very shiny.

The best part is that I still have a ton of stones left over, so I am prepared for… uh, mom-jewelry situations? … in the future.