Blossom Baby Afghan

Hi guys! Wow, it’s been a couple of weeks since I showed my face around here. Everybody doing well? Yes? No? Well, guess what I found while I was unpacking? Notes! Pattern notes!!!
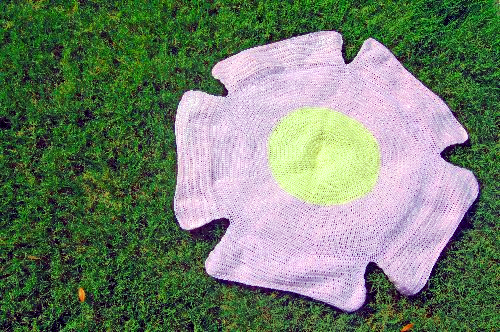
Notes for this!!!

Is there anybody out there that remembers this afghan? I made it almost five years ago, before we left for Japan. Seriously, I thought this pattern was gone forever. I guess that’s what unpacking for keeps will get you, though!

At the time, I intended to sell the pattern, but as I’m missing a few pieces of information that I would normally include (and, I’m pretty sure, that’s the only picture I have of it) I’ll just share it here!

Blossom Baby Afghan

Materials:

  • Bernat Softee Baby in Yellow and Pink (I’m not sure how much – I think less than 1 skein yellow and at least 2 skeins pink)
  • F/5 (3.75mm) hook
  • Stitch Marker to keep track of rounds (optional)

Directions:

Center: (Do not join rounds, it’s worked in a continuous spiral.)

Rnd 1: With yellow, ch 3. Make 11 dc in 3rd ch from hook. (11 dc)

Rnd 2: [Dc inc] in each st around. (22 dc)

Rnd 3: [Dc in next st, dc inc in next st] around. (33 dc)

Rnd 4: [Dc in each of the next 2 sts, dc inc in next st] around. (44 dc)

Rnds 5-14: Repeat Rnd 4, increasing the bold number by 1 each repetition. (Stitch count should increase by 11 each time; Rnd 14 should end with 154 dc.)

Rnd 15: [Dc in each of the next 13, dc inc in next st] around. (165 dc) Hdc in next st, sc in next st, sl st in each of the next 2 sts. Switch to pink.

Rnd 16: [Dc in each of the next 14 sts, dc inc in next st] around. (176 dc)

Rnds 17-29: Repeat Rnd 16, increasing the bold number by 1 each repetition. (Stitch count should increase by 11 each time; Rnd 29 should end with 319 dc.)

Rnd 30: [Dc in each of the next 28 sts, dc inc in next st] around. (330 dc) Hdc in next st, sc in next st, sl st in each of the next 2 sts. Begin first Petal.

Petal

Row 1: Ch 2. Dc in next st and each of the next 64. (65 dc) Turn.

Rows 2-3: Ch 2. Dc 65. Turn.

Row 4: Ch 2. Dc in first st, dc inc in next st. Dc across until 2 sts remain; dc inc in next st, dc in last st. (67 dc) Turn.

Row 5: Ch 2. Dc in first st, dc inc in next st. Dc across until 2 sts remain; dc inc in next st, dc in last st. (69 dc) Turn.

Row 6: Ch 2. Dc in first st, dc inc in each of the next 3 sts. Dc across until 3 sts remain; dc inc in each of the next 2 sts, dc in last st. (73 dc) Turn.

Row 7: Repeat Row 6. (77 dc)

Row 8: Repeat Row 5. (79 dc)

Row 9: Ch 2. Dc in each st across; turn.

Row 10: Ch 2. Dc in each of the next 27 sts, hdc in each of the next 25 sts, dc in each of the last 27 sts. Turn.

Row 11: Ch 2. [Dc dec] 3 times. Dc in each of the next 9 sts. [Dc dec] 3 times. Hdc in the next 10 st, sc in the next 17 sts, hdc in the next 10 sts. [Dc dec] 3 times. Dc in each of the next 9 sts. [Dc dec] 3 times. (67 sts) Turn.

Row 12: Do not ch. [Sc dec], [hdc dec], dc in each of the next 10 sts. [Dc dec], hdc in next 3 sts, sc in next 2 sts. Sl st in each of the next 25 sts, sc 2, hdc in the next 3 sts, [dc dec]. Dc in each of the next 10 sts, [hdc dec], [sc dec]. (61 sts) Finish off.

Join yarn in next available stitch to petal and repeat for second petal; repeat until there are 5 petals. Finish off, weave in all ends.

I hope you enjoy it!

Mulberry Syrup

So, when we woke up yesterday and turned to the last of the mulberries to finish de-twigging them, we discovered that they had disintegrated a bit overnight. No way were we going to get whole berries out of them. Fortunately, we had a plan!

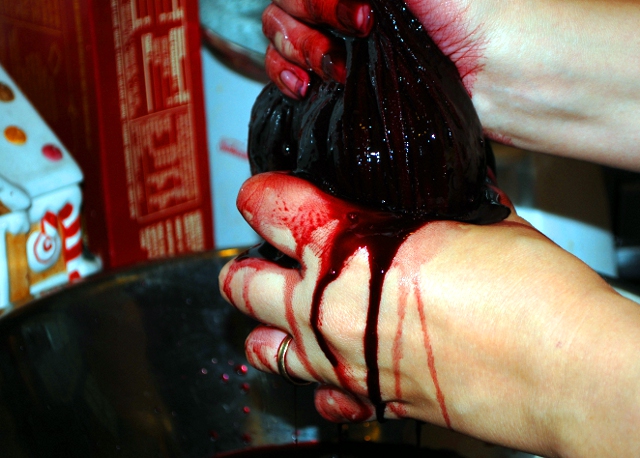
Squeezing the juices of those pesky berries.

Juicing very ripe mulberries is a walk in the park. We poured our remainder into a flour-sack towel and tied it to the handles of the top cupboards in the kitchen. (All done over a bowl, as the juice was already pouring out.) Then I squeezed until no more juice would come out. This took a while…mulberries are really very juicy. I let it hang for a few hours while I was making and canning jam.

When I was ready to make the syrup, I measured the juice and added an equal amount of sugar to it. Then I put it in a saucepan on medium-high heat and cooked until the sugar dissolved, and then I turned it down to medium-low until it reduced by about half. Alton Brown says that something like this should take about an hour; either he’s lying or I’m doing it wrong (both are possible) because it took mine about two hours and I had to turn it considerably higher than medium-low to get it to do anything more than sit there being warm.

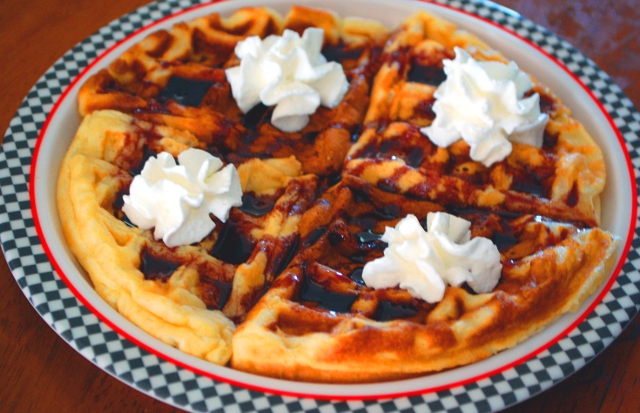
Still: end result? Syrup.

Pretty darn delicious!

So here’s the down and dirty:

Fruit Juice Syrup

Ingredients

  • 100% Fruit Juice (fresh or from concentrate)
  • Sugar – amount equal to your juice
  • Optional: 1/4 tbsp lemon juice per cup of fruit juice, best for sweeter juices. (I didn’t add this for the mulberry.)

Directions:

  1. Add juice and sugar to saucepan. Cook on medium high heat until sugar is fully incorporated.
  2. Reduce heat so that your mixture is just below boiling. (Boiling won’t hurt your syrup really, but it will make it foamier.)
  3. Cook, stirring occasionally, until mixture reduces by half. (May take an hour or more.)
  4. Remove from heat and allow to cool before transferring to a glass jar.
  5. Store in the fridge for up to 6 months – although I suspect you won’t need to keep it that long.

If we go back and get more mulberries, I’m going to try water bath canning some syrup so we can have the sticky, sweet – peculiarly tangy – mulberry syrup long after the last berries have fallen.

This entry was posted in Recipes.

Mulberry Cinnamon Muffins

So yesterday, we went out to the family farm because the black raspberries were ripening and the mulberries were just raining off the tree.

Mulberries + black raspberries = AWESOME.

Yeah. We got five and a half pounds of black raspberries and probably ten pounds of mulberries. Insane.

Unfortunately, mulberries don’t keep well, so we had to start processing them immediately. (Yeah, unfortunately, hahaha.) So after I put the first double-batch of jam into the bread maker (it turned out well but a little tart – I think I’ll try it sans lemon juice when I put the next batch in) I mixed up some muffins.

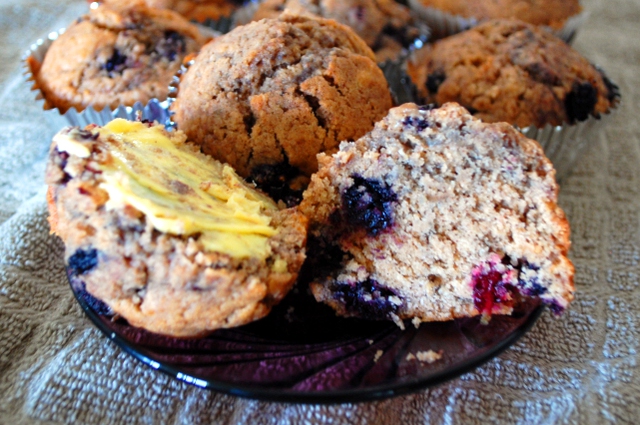
Tasty, tasty muffins.

Mulberry Cinnamon Muffins

Ingredients

  • 3 c flour
  • 1 c sugar
  • 4 tsp cinnamon
  • 3 tsp baking powder
  • 1/2 tsp salt
  • 2 eggs
  • 1 1/4 c milk
  • 1 c butter, melted
  • 2 c mulberries (or blueberries, raspberries, or whatever you have on hand)

Directions

  1. Preheat oven to 375 degrees.
  2. In a large bowl, combine dry ingredients.
  3. In medium bowl, beat eggs, milk, and butter. Add to dry ingredients and stir until just moistened.
  4. Fold in berries.
  5. Pour into greased muffin cups or paper liners. (Makes 18)
  6. Bake for 20 minutes or until a toothpick comes out clean.

These are tasty muffins and they held up well overnight for breakfast today. Look out! There are a LOT more berries to deal with around here.