Kirsten (Tasseled Earflap Hat)

Here’s the next pattern in the continuing effort to relocate my patterns from Crochet Uncut: Kirsten.
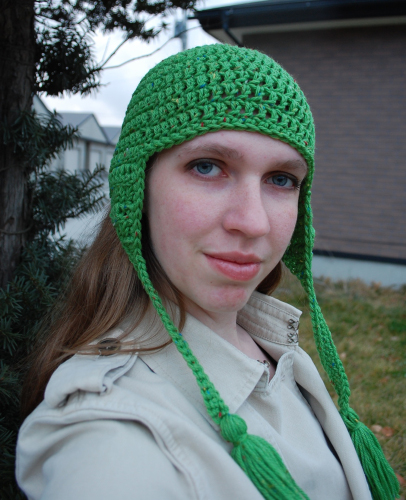
Kirsten by Melissa Mall

“A playful tasseled hat, crocheted in a beautiful rich color, is sure to brighten even the grayest day this winter. It’s quick, too! Double crochet, a large hook, and a lovely wool all combine to create a delicious fabric that proves something doesn’t need to be difficult to make a statement.

If you’re not familiar with making tassels, pompoms may be substituted at the ends. (Tassels are much less work than pompoms, though! Give it a shot!)”

Size: One Size – 23″ finished circumference

Hook: K/10.5 (6.5 mm)

Yarn: Cascade 220 Tweed [90% Peruvian Highland wool, 10% Donegal Tweed, 220 yds/100 g skein]; Green, 130 yds

Notions

  • Yarn Needle
  • Piece of thin cardboard 5 inches across

Gauge: 10.5 sts and 7 rows = 4”/10 cm

Directions

Hat

Rnd 1: Ch 3. Make 12 dc in third ch from hook, join with sl st in first dc.

Rnd 2: Ch 2, dc inc in every stitch around, join with sl st in first dc. (24 dc)

Rnd 3: Ch 2, *dc in next dc, dc inc in next dc,* repeat from * to * around, join with sl st in first dc. (36 dc)

Rnd 4: Ch 2, *dc in next 2 dc, dc inc in next dc,* repeat from * to * around, join with sl st in first dc. (48 dc)

Rnd 5: Ch 2, *dc in next 3 dc, dc inc in next dc,* repeat from * to * around, join with sl st in first dc. (60 dc)

Rnds 6-11: Ch 2, dc in each dc around, join with sl st in first dc. (60 dc)

Without breaking yarn, begin first Ear Flap.

Ear Flap

Row 1: Ch 2, dc in next 10 dc, turn. (10 dc)

Row 2: Ch 2, dc in next 10 dc, turn. (10 dc)

Row 3: Ch 2, dc dec, dc in next 6 dc, dc dec, turn. (8 dc)

Row 4: Ch 2, dc dec, dc in next 4 dc, dc dec, turn. (6 dc)

Row 5: Ch 2, dc dec, dc in next 2 dc, dc dec, turn. (4 dc)

Row 6: Ch 2, yo, pull up loop in each of next 4 dc, yo, pull through all loops but one, yo, pull through two loops. Ch 20. Fasten off, leaving an 18″ tail of yarn.

Skip 20 stitches of Hat’s round 11, join new yarn in next stitch. Repeat directions for Ear Flap.

Edging

Join new yarn where Ear Flap meets Hat. Ch 1, sc around edge by placing 1 sc in each dc around and spacing them as evenly as possible along edge of the Ear Flap. When you reach the ch-20, sc in each ch down to tip, make 3 sc in tip of ch to turn, sc in each ch along other side back up to Ear Flap. Repeat along other side until you reach the starting point. Join with a sl st and fasten off.

Tassels

Wrap 10 yds of yarn around cardboard piece. Thread needle with tail left at end of ch-20: take it through one end of tassel-loops a few times to secure. Slide tassel off cardboard. Secure tassel to hat with a few stitches. Wrap yarn around and through tassel-loops about 3/4″ from top as many times as possible, secure ends. Cut loops at bottom, trim ends if needed.

Finishing: Weave in ends. Wash and block as needed.

Simple Speedy Cowl

Second on the list of patterns being rescued from Crochet Uncut: the Simple Speedy Cowl.

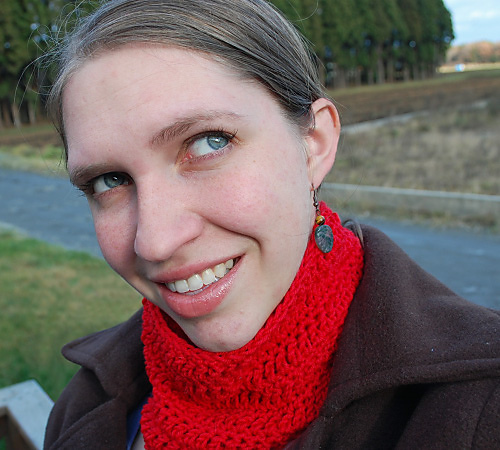
Simple Speedy Cowl by Melissa Mall

There’s not much that is more basic than a cowl – a simple tube of fabric, large enough to pull over your head and rest around your neck, cowls are a great way to use up a lonely stray ball of yarn, experiment with a new stitch pattern, or keep your hands busy during a movie. They’re so fast to make that they’re ideal last-minute gifts!

This single-skein cowl is simple and speedy, with alternating bands of single and double crochet forming a subtly interesting texture that requires only bare attention from you to navigate successfully.

Size: Approx 20″ around x 7″ wide

Hook: K/10.5 (6.5mm)

Yarn: 1 ball Plassard Pop 4 [100% wool, 110 m/50 g skein]; Any color, 120.3 yds

Notions: Yarn Needle

Gauge: 11 sts x 10 rows = 4″ in patt. Gauge is not crucial in this pattern, and it can easily be adjusted to accommodate different yarn or hooks – just make sure that your starting chain can slip over your head!

Directions:

Rnd 1: Loosely ch 55, join with sl st in 1st ch. Ch 1, sc around, join. (55 sc)

Rnd 2: Ch 2 (counts as 1 dc), *dc in next sc; rep from * around, join to 2nd ch of beg ch 2 with sl st. (55 dc)

Rnd 3: Ch 1, sc in 1st dc, *sc in next dc; rep from * around, join to first sc with sl st. (55 sc)

Rnds 4-11: Repeat rows 2 and 3. If additional width is desired, continue repeating rows 2 and 3, ending on row 3.

Finishing: Using yarn needle, weave in ends.

Simple Speedy Cowl by Melissa Mall

Crochet Uncut and a Mini Sweater Ornament

A few years ago, I designed several patterns for the webzine Crochet Uncut. This week I received a message through Ravelry about one of the patterns, claiming that the link was broken. Unfortunately, it seems that the site is now having some difficulty and all of the patterns are currently unavailable. I’ve thought for a while about transferring the patterns to one of my sites so they don’t become lost, and now seems like the time.

Here’s the first of several pattern reposts: the Miniature Sweater Ornament

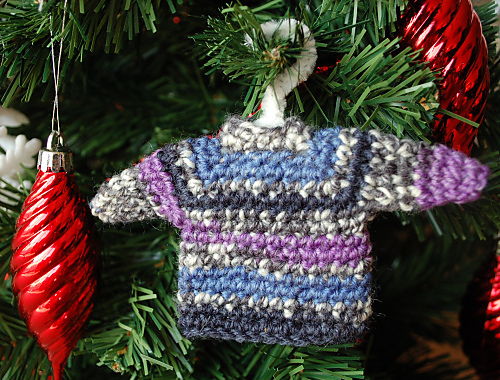
Miniature Sweater Ornament by Melissa Mall

Of all the things I can make with yarn and a hook, my favorites are the things that serve no purpose but look adorable. That’s the explanation behind this tiny sweater, which is the perfect size to use as a Christmas ornament. As a bonus, it’s also a great way to get acquainted with top-down raglan construction!

Size: Small sweater is 4.75″ from cuff to cuff, Large sweater is 7.25″ from cuff to cuff

Hooks: C/2 (2.75mm) for Small sweater, G/6 (4.25mm) for Large sweater

Yarn: Lion Brand Magic Stripes [75% wool, 25% nylon, 330 yds/100 g skein] for small sweater (25 yds); Bernat Handicrafter Cotton Holidays Stripes [100% cotton, 138 yds/80 g skein] for large sweater (35 yds).

Notions

  • Yarn Needle
  • Pipe Cleaner for hanger
  • 4 stitch markers, to mark increases

Gauge: Gauge is unimportant in this project, as long as a close fabric is produced. Different hook and yarn combinations can be used to produce sweaters of different sizes.

Directions

Rnd 1: Ch 12, join in a circle with a sl st. Ch 1 (does not count as sc). Working in back bump of chain to leave attractive edge, sc in each ch around and join with sl st. (12 sc)
Rnd 2: Ch 1, sc in first sc, *sc in next sc, rep from * around to first sc. Join with sl st. (12 sc)
Rnd 3: Ch 1. Working in front loops only, sc in 1st st, sc in next 2 sc; (3 sc in next st, placing marker in 2nd sc, sc in next st , 3 sc in next st, placing maker in 2nd sc) twice, join with sl st to first sc. (20 sc)
Rnd 4: Ch 1. Working through both loops again, sc in 1st st and in next 3 st to marker, (3 sc in marked st, replacing marker in 2nd sc, sc to marker) 3 times, 3 sc in marked st, placing marker in 2nd sc, sc in last st, join with sl st to first sc. (28 sc)
Rnd 5: Rep row 4. (36 sts)
Rnd 6:Rep row 4 (44 sts)
Rnd 7: Ch 1, sc in first sc and in next sc to marker. (Sc in marked st, skip sts between markers, sc in next marked st, sc to next marker) twice, sc to beginning of rnd. (26 sts) Do not join.
Note: Place marker in first st of each round to assist in keeping count of rounds.
Rnds 8-15: Sc around. Do not join at end of each round. At end of round 16, sl st in next st, fasten off. (26 sts per round)
Rnd 16: Sc around, sl st in 1st (marked) next st, finish off.

Sleeves
Rnd 1: Join in armhole at underarm. Ch 1, sc around. (11 sc) Do not join rounds while making sleeve.
Rnd 2: *2 sc, sc dec, rep from * around. (8 sc)
Rnds 3-5: Sc around (8 sc)
Rnd 6: 2 Sc, sc dec, rep from * around. (5 sc)
Rnd 7: Sc around (5 sc) Sl st in 1st st of rd 6, next st, finish off.
Repeat sleeve on other side.

Miniature Sweater Ornament by Melissa Mall

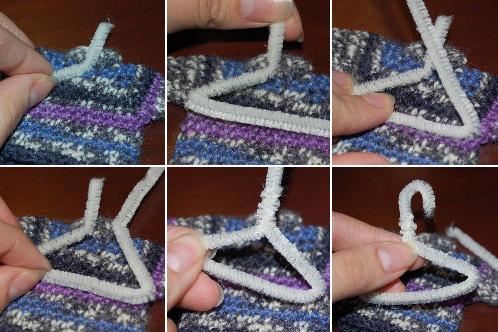
Finishing: Using needle, weave in ends. If desired, make hanger from pipe cleaner, following images below.

Miniature Sweater Ornament by Melissa Mall