Imagine
  • Home
  • Zazzle-Dazzle!
  • Patterns to Buy
  • Tutorials
  • Printables
    • Phineas and Ferb Coloring Pages
    • Bug Sticker Scene Coloring Pages
    • Harry Potter Unit Printables
  • Free Patterns!
You are here : Imagine » Learning, Other Projects » How to Draw Agent P in 5 Steps
  • About Me
    About UsHi! I'm Melissa. I'm a twenty-something at-home mom with four boys seven and under. I'm LDS, I homeschool, and I knit, crochet, sew, cook, draw, write, and generally hold down the fort while my husband pursues dreams filled with motorcycles. We're either genuinely insane or the sanest people you'll ever meet. Stick around and find out which it is!
  • Crochet Toy Pattern Bundle

  • Our Sponsors

  • Recent Posts

    • Calypso Bracelet »


    • Crochetvolution is here! »


    • Best Ever Mint Brownies »


    • Whew! Finally! »


    • Crafting Spring Flowers »

  • Our Sponsors

  • scarlet macaw hand puppet

    May is for Moms 2011

    Crochet Toy Pattern Bundle

How to Draw Agent P in 5 Steps

Published Monday, February 11, 2013 By Melissa. Under Learning, Other Projects    

My kids love Phineas and Ferb (especially Perry the Platypus/Agent P). They’ve gotten really good at drawing Perry as a platypus, but when they tried to draw him as a secret agent they just couldn’t figure out what to do. We looked online for ‘How to Draw Agent P,’ but after we tried this “super easy” 4-page 20-step tutorial and ended up with knots of unerased lines, we decided we needed something easier.

This tutorial is probably not great for someone looking to make an exact, professional-looking art piece, but if your five year old just wants to draw an Agent P picture, this should help.

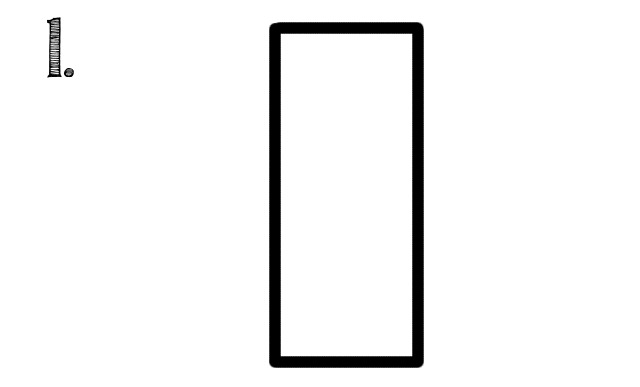
1. Start with a standing-up rectangle.

Step 1 - How to Draw Agent P in 5 Steps

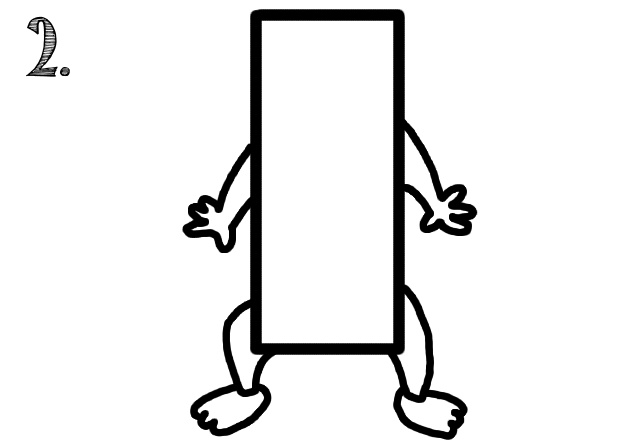
2. Add arms and legs.

Step 2 - How to Draw Agent P in 5 Steps

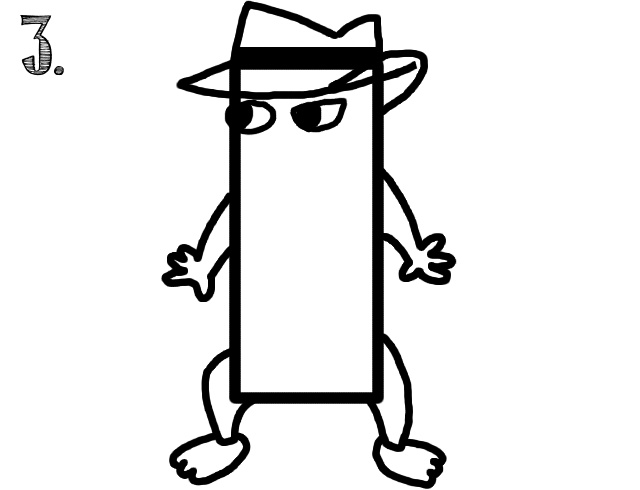
3. Draw the hat and some sneaky secret-agent eyes.

Step 3 - How to Draw Agent P in 5 Steps

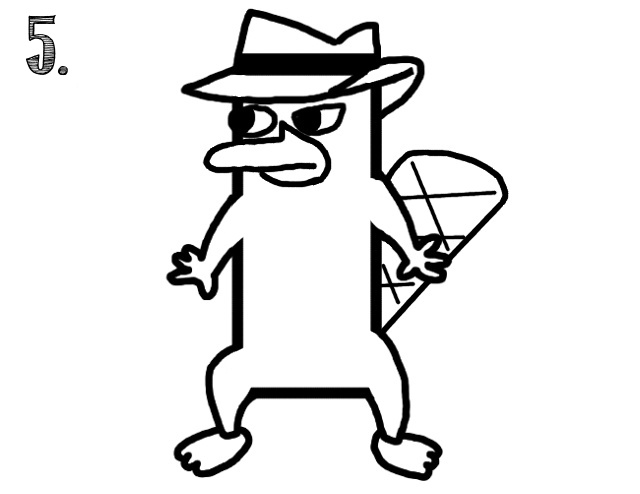
4. Add Agent P’s beaver-tail and bill!

Step 4 - How to Draw Agent P in 5 Steps

5. Erase any extra lines and draw the criss-crosses on his tail.

Step 5 - How to Draw Agent P in 5 Steps

Not pictured here is step 6: color! The kids had much better results with this kind of ‘whole picture’ approach than sketching armatures. Hope you enjoyed it!

Please share this post!
Tweet

You May Also Like:

  1. Games for an Agent P Party Games for an Agent P Party
  2. How to Make a Necklace Holder How to Make a Necklace Holder
  3. Rummaging Around the Blog Rummaging Around the Blog
« Refresh Your Coloring Books in Minutes
Crafting Spring Flowers »

Leave a Reply

Click here to cancel reply.

CommentLuv badgeShow more posts

  • Social Bookmarking
  • Our Sponsors

  • Blogroll
    • 30 Handmade Days
    • A Sonoma Garden
    • All for the Boys
    • At Second Street
    • B is For Boy
    • BonBonanza
    • Colour in a Simple Life
    • Crochet Day to Day
    • Dana Made It
    • Easy!
    • Frugal Family Fun
    • Grocery Shrink
    • How We Montessori
    • I am Momma Hear Me Roar!
    • Latter-Day Homeschooling
    • Lesson Plan of Happiness
    • Living with Lindsay
    • Made by Rae
    • Make It Love It
    • Micah Makes
    • Nesting Place
    • Ordinary Miracles
    • Planet June
    • Probably Actually
    • Random Meanderings
    • Ruffles and Stuff
    • Tech Knitting
    • The Boy Trifecta
    • The Pioneer Woman
    • The Purl Bee
    • Vanilla Joy
    • Wee Folk Art
    • What a Yarn!
  • Meta
    • Log in
    • Entries RSS
    • Comments RSS
    • WordPress.org
  • Hit Counter

Copyright © 2013. All Rights Reserved.